Thursday, November 16, 2017

23 Things to Make with the New Girl Scout Fabric


I, and volunteers around the country, let out a great squeal of excitement the other day when we learned that there is now such a thing as Girl Scout fabric.

Because obviously I don't live and breathe Girl Scouts enough--I also have to WEAR IT!!!

Which is about right, because I'm the kind of person who really just wants to spend my free time doing something along the lines of wearing Harry Potter jammy pants (which I own) and a Harry Potter shirt (which I own), watching Harry Potter on DVD (obviously), while flipping through the books (so I can compare them to the movies of course!).

Give me a chance to run a Girl Scout troop meeting while eating Girl Scout cookies and wearing jammy pants and a... I don't know, poncho?... made from Girl Scout fabric, and I am all. In!

Anyway... I don't actually have any Girl Scout fabric in my hands right now, because what I am actually doing is living and breathing the Nutcracker instead, but soon, my Friends. Soon Thanksgiving break will come, which means that Nutcracker rehearsals will be on hiatus and all I'll have to do is keep practicing my French braiding (Syd is wearing a wig this year, and has to have her hair French braided and pinned to her skull underneath it), so I will have LOADS of time to finally drive that whole ten minutes from my house to Joann's and buy myself some Girl Scout fabric.

ALL of the Girl Scout fabric.

The only thing that I know for sure right now that I'm making is jammy pants for me and the girls, because of course, so this long list that you're about to read is just me brainstorming other cute things that I think would be even cuter when sewn with Girl Scout fabric:
  • fleece blanket with trim. This fleece blanket would definitely be simple enough for a kid to sew, but the addition of the trim would add a lot of interest. A Girl Scout green trim would be especially cute.
  • tote bag. I could definitely use a couple of tote bags to carry around all of my Girl Scout meeting supplies. The simple lines of this one would let the fabric print take center stage (I write, just a few yards from a literal center stage, as Syd dances the Mother Ginger dance in a rehearsal room three flights up)
  • bucket bag. This roomier bag that you can close completely would make a good choice for the kids to carry their own stuff to troop meetings, or on overnights.
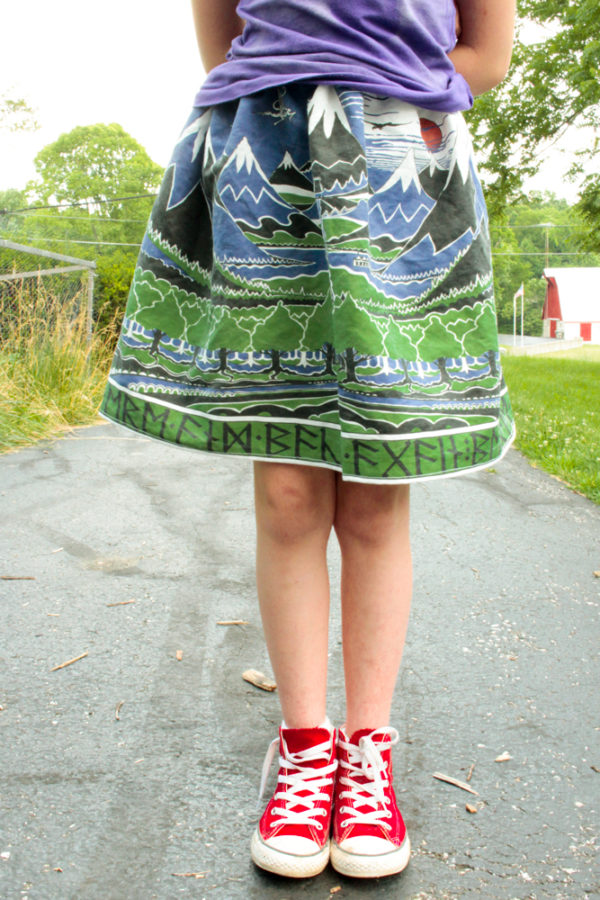
  • circle skirt. The fabric is a little spendy, considering that I already own plenty of cotton fabric, and it couldn't be part of either kid's uniform (I've already sewn the kid who wears skirts a Girl Scout uniform skirt, reversible with a prettier print on the other side because who can get excited about a khaki skirt?), but I do think that a simple circle skirt, made with one of the cotton prints, would look really sweet when paired with a camp T-shirt.
  • quilt. I wouldn't make a quilt just out of Girl Scout fabric (although maybe I should squirrel some away, or even start assembling blocks, for the Girl Scout T-shirt quilt that I'm planning to make both of my girls when they're older?), but I really like this method for using up smaller scraps of fabric in quilts
  • headband. This would be the PERFECT thing to make with the fabric! The kids could wear it with their uniforms, but it wouldn't be so branded that they couldn't wear it with their everyday clothes, as well.
  • zippered pouch. Depending on the size, the kids could use this to carry their cash while selling cookies, or it could hold their SWAPS at events.
  • sun hat. My favorite hat pattern is on Creativebug, but since I can't link to that one, this one is  a close second. My original idea for sun hats had been a Girl Scout color on one side and a fun print on the other, but both kids understandably rebelled at having yet one more khaki accessory. But if one side was a fun GIRL SCOUT print, it would totally work!
  • messenger bag. All of the girls in my troop could really use a small messenger bag like this one, just big enough to hold their water bottle and their notebook and pencil.
  • pajama shorts. These would be cute summer pajama bottoms, especially for Girl Scout camp. If you wanted to make a complete pair of pajamas, you could take a white shirt and applique a trefoil or your girl's initial on in the same print.
  • pillowcase. This would be another cute item to take to Girl Scout camp--make pajamas, the fleece blanket, and the pillowcase, and your kid will be totally decked out! Notice that I'm not linking my favorite burrito pillow method, because this particular tutorial is better if you want to fussy cut your fabric, which you would.
  • water bottle sling. I still like the idea of the slightly larger messenger bag better, because I like the girls in my troop to also bring their notebooks and pencils on field trips, but for hiking, a kid could just throw her water bottle sling over her shoulder and be all set!
  • pajama pants. I deeply want to make jammy pants for me and both girls out of fleece, but this pattern would work with cotton or flannel, too.
  • bean bag checkers. This fabric checkers set would be another opportunity to fussy cut and show off the cute Girl Scout prints. The whole set would be something fun to bring out on troop camping trips. Because you HAVE to play checkers when you're camping!
  • bandanna quilt. You'd have to modify this tutorial, because bandannas don't need hemming, but this would still be a pretty simple project to sew, and the four big pieces mean that it wouldn't have a lot of prep work, either.
  • pennant. Instead of felt for the background, you could use a Girl Scout print with interfacing behind it. Put each girl's name on it in felt, and I could imagine it being a cute souvenir for them to carry in a parade, or to plant in front of their tent while camping or at camp.
  • bean bags. You can do all sorts of games with a set of bean bags, so this would be a good permanent addition to a Daisy or Brownie troop.
  • lunchbox napkins. I've sewn a couple of these for the kids to use when they take a packed lunch somewhere. They're easy to sew, and would be a good teaching element/party favor for a meeting dedicated to the Junior Social Butterfly badge. 
  • one-seam skirt. Syd has made this exact skirt as a birthday gift for another little girl before, so I know a kid can sew it! You can use one cut of fabric to make two identical skirts, actually, so a whole troop of girls could learn to sew by sewing their own Girl Scout skirts.
  • apron. There are cooking badges at all levels of Girl Scouts, so girls of any age could use their own aprons. For Cadettes and up, though, you probably need to find a bigger pattern, as this particular one looks like it's designed for younger kids.
  • Geranium dress. This is a dress pattern for kids; I think the clean lines would show off a special print nicely.
  • ouch pouch. This is a little bag that can hold a small first aid kit--the tute uses quilting cotton and shows you how to piece a little red cross onto the front. As Juniors, both of my girls made backpack first aid kits as part of their First Aid badge, and this would have been so cute to put them in. Actually, they still carry those first aid kits, so maybe I could just surprise them with new packaging...
  • fabric-covered notebook. Even non-sewers could show off their cute fabric this way, and it would help the girls identify which notebook they're supposed to be bringing to meetings.
Have any other ideas for things to make with the Girl Scout fabric? I'm still brainstorming, so let me know!

Tuesday, November 14, 2017

Our Handmade Paper Came Out Awesome!

The Girl Scout Cadette Book Artist badge may turn out to be my favorite of the Cadette badges. It has hands-on art elements, some science and history, and you know how much we all love books. It speaks to me especially, since one of my Master's degrees is in Library Science, with an emphasis on Special Collections. Next month, my Girl Scout troop is actually taking a field trip to the special collections library where I spent much of my time working in the Reading Room in grad school, preparing the delicate collections for patrons and monitoring their use.

Most of the Book Artist badge is about bookbinding, with a bit of book repair thrown in, but you know that I have never met a lesson plan that I didn't burn to meddle with, so I have added two components to this badge: making paper and altering books.

I'll tell you more about our journeys in book altering later (just imagine embellishing old book pages, and making book page crafts, and turning books into art journals, and all kinds of other projects that treat damaged old books as resources), but we have just finished the last batch of homemade paper that we're doing for this badge, and so it's the perfect time to show it off!

Making paper is shockingly easy, but it does require a couple of special supplies that are likely what keep it from being something that everyone, everywhere does all of the time. Years ago, I scored at Goodwill an immaculate vintage children's paper making kit, with two perfect screens. I'm a little glad that the children haven't shown interest in the kit until now (and yes, it HAS sat on the playroom shelves completely untouched until now--strewing something doesn't guarantee they'll use it!), because the mesh on the screens can be fragile, and I'd rather have the screens now, when we really have a purpose for them, than to have had the kids goofing around with them years earlier and breaking them. Here's a similar paper making kit.

The other thing that you need is actually even optional: I bough the last sheet of paper making pulp from our local art supply store, but you don't even really need that, as torn-up white paper will also do for your amateur efforts.

The kids tore some of the paper pulp into chunks, but I really wanted to include an upcycling component in our project, so I brought out some of the ripped-up comic that I used to buy for a quarter apiece back when I was selling comic book pinbacks at craft fairs.


These are mostly vintage, and the kids almost got permanently distracted by poring over the ads, of all things:


To be fair, the ads are really great:


Like, who wouldn't want a blow-up pillow with Raquel Welch on it?

Ahem.

To the kids' irritation, I then stopped the entire world and made them have a lesson inspired by this ad:


I didn't blog about all of our acid and base experimentation back when the kids were super into it a few years ago, but one of the demonstrations that they did that was super cool and mindblowing was when they mixed citric acid and baking soda. Both substances, being dry, didn't react, but when the kids put the mixture into plain water--it erupted!

So imagine a white powder, similar to table sugar, that would cause a foaming reaction when wet, and boom! Foaming sugar!

Anyway... read the comics, then tear them into pieces and add them to your paper pulp:

Add water--


--and blend to bits!


The best wide bins that we own are the kids' work drawers, so we temporarily sacrificed the Monday drawer to our project:


It looks really gross, in my opinion, so add a bunch of water to cover it up:

I walked the kids through the process of creating one piece of paper each (even nicer that our paper making kit has two screens!)--


--and the paper pulp can keep for a while, so we let it sit out on the counter. When the kids' first pieces of paper were try, I then required them to each dip and make another piece of paper independently, without being walked through the process. And when THAT piece of paper was dry, they each had to think up and add an embellishment to the process. Will had really wanted to add colored thread, which I thought was an awesome idea, but then Syd added glitter to her paper so Will changed her mind and added glitter, too.

We ended up with plenty of homemade paper!

Fun fact: paper is ridiculous to photograph. It threw off my white balance and now I can't get it right, but trust me, there's glitter in there:

I like that you can also see the bits of comic book, but they're small enough that you can't tell what it is, just that it adds some extra color to the paper.

Homemade paper has a rough side that you can iron down if you want to use both sides--

It also works best with gel or ballpoint pens, not markers or felt tip pens, although you can paint it with a gelatin wash if you do want to use felt tips.

I don't have a purpose in mind yet for the kids' handmade paper, but there will be several different opportunities to make books throughout the Book Artist badge, so I'm keeping this paper, as well as the book pages that they've already altered and embellished, in a portfolio for them, and hopefully they'll be inspired to include some of the pieces in the several books that we'll be making during the course of this badge.

P.S. Love homeschooling or crafting or reading instead of cooking dinner? Follow my Craft Knife Facebook page and let me drag you down into distraction daily!

Friday, November 10, 2017

How to Metal Stamp Dog Tags

Metal stamping, especially metal stamping dog tags, is actually super easy, accessible and with a short learning curve, and great for kids. My kid who isn't really into crafts still gets into metal stamping, and my kid who is REALLY into crafts does all kinds of creative things, making cute slogans and gift tags for friends, etc.

I'm not that creative with it, but I do think it's fun and you can make some handy stuff. I took Syd's good idea and made some gift tags for Christmas gifts,  and a couple of tags with my name on them to put on my stuff--I am always leaving my stuff places!

The "real" metal stampers will tell you that you need a steel anvil, and that's awesome if you've got one on hand, but just between us, we've always done all of our metal stamping on top of a flat brick. I'll show you later how it makes the tag look a little janky on the back, but honestly, it's fine.

Here's what you actually need!

  • metal stamps. These 1/4" stamps are easier to wield--


--but I think that the look of the 1/8" stamps is nicer and more sophisticated. 
  • something to stamp. We played a little with stamping on coins, and it works, but I bought this pack of dog tags--


--and that's what we mostly use. I like that there are tons of tags in the set, so that when there's a group who's all stamping with us,  I can encourage them to do a couple of practice tags first. I HATE feeling the pressure to do something right the first time just so I don't "waste" supplies!

I haven't tried stamping on flattened soda cans yet, but it's on my to-do list!
  • something to stamp on. This steel anvil is the best surface to use, but we get fine results by using a regular old brick.
  • masking tape.
  • hammer.
  • fine-point Sharpies (optional).


1. Set up your dog tag on the brick, with masking tape to hold it down. The masking tape also makes a good guide line, although don't try to line your stamp up against it, or you'll end up stamping over the top of the tape and your stamped image won't be as crisp.

2. Starting at the center of your word, hold the stamp level against the dog tag and give it one hard whack with your hammer:


If you're using dog tags and a brick, it won't hurt your stamp to whack it more than once to make the image, but it's likely going to blur your image to do that. So just harden your soul, screw your courage to the sticking place, and WHACK that stamp!


Here's what the back of the tag will look like:

That raised pebbling is what I meant by the back of the tag looking kind of janky--it would be nice and smooth if you used a steel anvil, but YOU try throwing your dog a birthday party and having dog tag making the party craft, and YOU buy a steel anvil for every party guest to use at the same time!

That's right, a brick works just fine, doesn't it?

3 (optional). Use a fine-point Sharpie to carefully trace the lines of your stamping:


It gives the stamped image a nice contrast to the plain metal tag. 

I left these stamping supplies out on our playroom table all week after the dog's party, and this morning I came by and noticed all the tags that the kids have stamped off and on all week. Here are a few of them:
I made this one as a reusable gift tag.

Syd made this one. I have no idea what her plans are for it.
I encouraged the kids to make these as future SWAPS.


Will made a dog tag for the dog!
 This project seems to appeal to everyone. It's highly satisfying to whack something with a hammer as hard as you can, and my non-crafty kid seems to appreciate the fact that she can make a whole tag in less than five minutes. At the same time, if you like fiddly work, you could also spend ages of time getting all your letters lined up just right, or making each tag ever more decorative, or even buying more fonts or symbols if you wanted.

Or you could do what I do, and make another gift tag for someone every time you pass. Next time I go in there (to sort LEGOs, which is my other endless project currently running), I need to make a tag for Syd's ballet teacher that will go with her Starbucks gift card, Syd-made card, and letter from me explaining in detail that she is the best ballet teacher my kid has EVER had.

Thanks for being so awesome, Victoria!

Thursday, November 9, 2017

How to Make a Girl Scout SWAPS Banner

Of course, girls can store the Girl Scout SWAPS that they've collected in a shoebox or plastic bin, and most girls do, which is fine, but frankly, in our house we have more wall space than we have shelf space, and so I thought that SWAPS banners would be a cute decoration for my girls' bedroom, as well as a way to organize and display their SWAPS that didn't mean there was one more plastic bin sitting untouched on a shelf.

I don't do that KonMari thing at all, but I do like our possessions to be actively used and loved!

If you've done any kid crafts, you likely have felt in your stash, and you may very well have an unused dowel hiding out in your garage, or a nice-looking stick in the backyard (after yesterday's all-day/all-night storms, which included me having to hide five young party-goers in the children's bathroom during a tornado warning, complete with their plates of cake because they wouldn't let go of them, we have LOTS of nice-looking sticks in our backyard!), which means that you could very well make this banner today, using supplies that you already own.

That's my favorite kind of project!

To make this Girl Scout SWAPS banner, you will need:

  • felt, any color, dimensions 12"x24": You can cut your felt to any size, of course, and if you're part of a council that's really into SWAPS, or you have several destinations planned where you know there will be SWAPS, you may well want to make yours larger--maybe a lot larger! Our council doesn't offer many SWAPS opportunities, however, so the only chances that my kids have to exchange them are at the yearly Girl Scout overnight at the Indianapolis Motor Speedway, and recently at the Girl Scout National Convention. If the pace doesn't pick up, then this banner will have plenty of room for the rest of their Girl Scout SWAPS.
  • letter stencils: I wanted to use my Cricut to make stencils, but the old version of Cricut Craft Room isn't playing nicely with my newish-to-me computer, so I used some large-format alphabet stickers as stencils instead. I think the letters actually worked out really well!
  • dowel or stick: This should be longer on each side of the felt so that you can use it to hang your banner. I found a 3' dowel in the garage and asked Will, who has earned her Cadette Woodworker badge, to saw it exactly in half for me.
  • sewing supplies. I used a sewing machine, but this would be simple to sew by hand, or even to hot glue.
1. Cut felt to 12"x24", then turn the top edge over by 1" and sew:

I made this channel pretty wide, because at the time I hadn't raided the garage, and I wasn't sure what sort of hanger I'd end up with. Stash PVC pipe was another final contender.

2. Cut letters out of felt:

It was pure happenstance and good luck that the stickers that I found to use as stencils fit perfectly on my banner. Yay!

3. Sew or hot glue the letters to the top of the banner:

Seriously, look how nicely they fit! I used hot glue, and put the top edges of the letters over my stitching line to hide it a little.

4. Add the SWAPS:
Notice the post-Halloween candy in her mouth.
One of the reasons why I wanted this banner was so the kids could organize their SWAPS by event. You could print each event and date on fabric and sew it on, but I just wrote it on cardstock. The day was starting to get away from me, and "done is better than perfect!"

You can see both of my labels on Syd's banner below, and how she's organizing her SWAPS by event. Just what I'd hoped for!

I hung the kids' banners in their room, in a piece of wall real estate exactly the right size for them, and next to the behind-the-door hooks where they keep their Girl Scout uniforms:

You might think that one kid is way more into SWAPS than the other, but I believe the reality is that Will hasn't remembered where she stashed all of her SWAPS yet (probably stuffed somewhere I don't want them, after hearing me prod the kids to clean their dang room already because we're having company).
I like that the items are themed together--hanging from the doorknob is even a washer necklace painted in Girl Scout colors!--and now I consider that entire space to be devoted to Girl Scout decor. I have a postcard-sized portrait of Juliette Gordon Low that I've been looking for a home for, and I'm wondering if I should paint the Girl Scout Law around the door frame (although surely that would also involve repainting that grody nonsense first...) or stencil a quote onto the high part of the wall above the door.

Any suggestions?

Wednesday, November 8, 2017

I Made My Kids Halloween Pillowcases

Holiday pillowcases are my new thing. They use up a ton of stash in a flash, AND since they're holiday-specific, they use up those weird holiday prints that you bought for, like, one project and now they're all just sitting there because where on earth are you otherwise going to use orange quilting cotton with candy corn printed all over it?

In a pillowcase, of course!!!

I panic-sewed these Halloween pillowcases the day of trick-or-treating, because I had the dream of the kids using them as their trick-or-treat bags instead of plastic Jack-o-lantern buckets. Before Wal-mart started making cheap plastic buckets a thing, kids actually would use pillowcases, and I think the nostalgia behind the look is sweet.

The kids didn't love my idea, because their vision is a giant trick-or-treat bag with handles for easy carrying, but whatever. When they sew their own bags (Ha!), they can put handles on them.

Until then, they have these bags!

The kids had to dump the candy out before I could take photos.
 

Here's Luna, acting like she's guarding the candy, but really she's hoping that we'll leave her attended with it.

On Halloween night, Will left her bag of candy within Luna's reach. The next morning, of COURSE we woke up to an empty bag and too few wrappers. We figured out that there wasn't enough chocolate in her bag to have poisoned Luna, but still, three days later I had to dose that dog with coconut oil and psyllium husk powder before she pooped.

Rotten dog.


I used the burrito pillowcase method, which is by far my favorite method of making pillowcases. You could probably even ditch that narrow piece of trim, for a super simple pillowcase that kids should have an easy time sewing:

I still have some Halloween fabric left (seriously, why do I have so much Halloween fabric?), but if I made Halloween pillowcases for me and Matt, that would just about use it up.

And you know what? I have Christmas fabric around somewhere... 

*wanders off to go make Christmas pillowcases instead of lunch for her children*

Thursday, November 2, 2017

Halloween 2017: Stick Girl and the Unicorn

It's bittersweet, how our Halloween traditions evolve as the kids grow older. How many years since I've made them ice skulls to dissolve with salt and liquid watercolors? How many years since hammering nails into a giant pumpkin was their very favorite holiday activity?

How many years since we've spent the whole, entire day of Halloween doing festive Halloween activities? Not this year, since Will needed to take yet another practice SAT exam in the morning, and Syd needed to spend half of our city's official trick-or-treat hours in ballet class.

Jack-o-lantern carving remains the funnest, though, although I do believe that this is the first year that the children wanted to try using stencils instead of making their own faces. I miss those original, kid-created faces, but the stencil designs are lovely, too, and I think the kids are even more pleased with them:


My favorite Halloween tradition now is one that we've only been doing for a couple of years, because it only works with these big, independent kids. One evening in late October, we have a Halloween feast, with each member of the family responsible for choosing and preparing her own Halloween dish completely independently. Syd made breadstick bones, which I forgot to get a photo of, we ate them up so quickly. Will made worms in dirt cupcakes:


I was boring, in that I made mashed potatoes and roasted brussels sprouts--not Halloween-themed at all, but we needed some vegetables in our bellies!

Matt was the most interesting--he made both this zombie brain cocktail, which looked a LOT better than it tasted--

--AND this meatloaf mummy:


It was the hit of the party, for sure!

It was also delicious.

On another night, Syd decorated our homemade pizza to look like a monster:

That one didn't actually end up looking monstrous at all, post baking, but we told ourselves that it was quite spooky, anyway, and munched it up while watching Young Frankenstein.

If you have kids of trick-or-treating age, you may have noticed over the years that trick-or-treating events have gotten completely out of hand. As if one night of begging for candy isn't enough (it IS!), in our town you can also go trick-or-treating from our local university's fraternities and sororities the week before (which we do, because it's awesome), trick-or-treating from downtown businesses the weekend before Halloween, trunk-or-treating from any number of churches in the weeks leading up to the day, and this year our annual Girl Scout overnight at the Indianapolis Motor Speedway ALSO had trick-or-treating!

 I unabashedly gave out glow sticks instead of candy, because seriously, nobody needs this much candy!

And when we ran out of glow sticks, yes I DID give out apples! "It's NATURE'S candy!" I declared to a frowny-faced tween. Her friend laughed at the look on her face, too, and then immediately took a big chomp out of her own apple right then and there.

The shining moment of Halloween, for parents, is the photo of all the kids in their costumes heading out for trick-or-treating, excitement on their faces. Every year, however, we are ever more ruled by Syd's ballet schedule, and not only did she have Nutcracker practice instead of the fraternity/sorority trick-or-treating this year, but for the second year in a row (and I think it'll be the same next year, sigh...), she had ballet class ON Halloween. And that class ran until 7 pm!

And that's why I have separate photos of the kids this year. Here is my unicorn:


And here is my Stick Girl!


Just between us, assembling this costume is one of the worst things that I have ever done in my life--just maddening. Agonizingly frustrating. Tedious. And you had to pretty much do the whole thing from scratch every time she wanted to wear it! I was practically in tears each time. And yet it was so, so worth it!

I bought Will two strings of battery-operated LED lights (and we could have used three), with the understanding that we'll use them someplace else afterwards--I think they'd be great for lighting up a campsite, for one thing. I also bought her a black hoodie and black sweatpants--thank goodness for Goodwill! She painted her face, and then Syd and I taped the lights directly to her clothes. The lights do have sticky backs, but you still have to tape over them with clear packing tape to make sure they really stick. You also have to do the math to figure out how to arrange them so that you don't run out before you've got everything placed, and yes, I DID have to pull one set off and redo it every. Single. Time.

But just look at what you end up with, and ignore my super loud, high-pitched giggling:


It's even more hilarious in person.

Thanks to Facebook, I noticed the absence of a few trick-or-treater photos this year. It seems that some kids Will's age, and even some kids a year younger than she is, are no longer trick-or-treating. I have to admit that I'm relieved and thrilled that it never so much as occurred to my big kid, thirteen whole years old, that she might be too old to trick-or-treat. She and her buddy, who's within a week of being her exact age, both dressed up in the two most elaborate costumes that I saw all night, and both hit the neighborhoods hard, walking for hours, happy as clams. We for sure saw bigger kids out and about, too--I saw a high schooler whom I know from fencing, out with a pack of people her size, all happily trick-or-treating, as well.

I don't want my kids to cling to childhood, exactly--don't we all know some people our age who do just that, and it's not that great?--but I don't want them to feel like they have to abandon it, either, before they want to. I want them to savor all these small experiences, the trick-or-treating, the pumpkin carving, riding bikes and camping with their friends, dressing up dolls and building with LEGOs, without any pressure to change themselves or fit in with someone else's perception of what an eleven-year-old or what a thirteen-year-old should be doing and enjoying. I mean, one year they won't even WANT to go trick-or-treating, and that's the year they should stop, and not one year before.

And certainly not this year, when Stick Girl and the Unicorn had the time of their lives, were driven home in the dark, and then sat on the family room rug and spent the rest of the evening sorting their candy.